本家 : SquirrelMail
SquirrelMail に関するインストールメモ(2003/07/14,
更新日:xxxx/xx/xx)
通常(←この言い回し嫌い) FireWallで隔離された環境では、セキュリティと不用なトラブルを避けるため不必要なポートは全て閉じられています。当然外部の pop/smtp/imap を参照する事もできませんし、ssh や telnet などもっての他で閉じられています。ただ昨今は、インターネットに接続されていないと仕事にならない場合もあり Web(http/https)だけは、開放されているのが普通です。
そこで SquirrelMail を使用すると外部からのアクセスは Web(http/https)を使用し、メールで使用する pop/smtp/imap 処理は、SquirrelMail 内部で処理するため FireWall の内側にいても外部アカウントのメールを送受信することができるようになります。ようは、自宅のメールをWeb経由で見れるっていうもんです。
Qube3j には、あらかじめ Apache/PHP がインストールされているのでなんにも心配ありません。
が!デフォルトで使用していない人は、 PHP = ”mbstringが有効”になっていること。Apache = ”コンパイルオプションが、dso であること”が前提ですの修正しちゃった方は、もとに戻しておくこと!
1.まずはインストールをしようね♪ と、web公開用のディレクトリに移動します。
$ cd /tmp
$ wget http://heanet.dl.sourceforge.net/sourceforge/squirrelmail/squirrelmail-1.4.1.tar.gz
$ su
# cd /home/groups/home/web
# gzip -cd /tmp/squirrelmail-1.4.0.tar.gz | tar xf -
# mv squirrelmail-1.4.1 webmail2.アクセス権限の設定。
# cd webmail
# chown -R httpd.httpd data
# chmod 730 data
# cd /var/tmp/
# mkdir attach
# chgrp -R httpd attach
# chmod 730 attach3.設定をします。下記はメニューです。※赤字は、コマンドです。
# cd /home/groups/home/web/webmail
# ./configure
SquirrelMail Configuration : Read: config.php (1.4.0)
---------------------------------------------------------
Main Menu --
1. Organization Preferences
2. Server Settings
3. Folder Defaults
4. General Options
5. Themes
6. Address Books (LDAP)
7. Message of the Day (MOTD)
8. Plugins
9. Database
D. Set pre-defined settings for specific IMAP servers
C. Turn color on
S Save data
Q Quit
Command >>4.Organization Preferences(1) の設定です。※赤字が変更点
SquirrelMail Configuration : Read: config.php (1.4.0)
---------------------------------------------------------
Organization Preferences
1. Organization Name : SquirrelMail
2. Organization Logo : ../images/sm_logo.png
3. Org. Logo Width/Height : (308/111)
4. Organization Title : SquirrelMail $version
5. Signout Page : http://www.sea-bird.org
6. Default Language : ja_JP
7. Top Frame : _top
8. Provider link : http://www.squirrelmail.org/
9. Provider name : SquirrelMail4.Server Settings(2) の設定です。※赤字が変更点
SquirrelMail Configuration : Read: config.php (1.4.0)
---------------------------------------------------------
Server Settings
General
-------
1. Domain : sea-bird.org
2. Invert Time : false
3. Sendmail or SMTP : Sendmail
A. Update IMAP Settings : localhost:143 (other)
B. Change Sendmail Config : /usr/sbin/sendmail4.General Options(4) の設定です。※赤字が変更点
SquirrelMail Configuration : Read: config.php (1.4.0)
---------------------------------------------------------
General Options
1. Default Charset : ISO-2022-JP
2. Data Directory : ../data/
3. Attachment Directory : $data_dir
4. Directory Hash Level : 0
5. Default Left Size : 150
6. Usernames in Lowercase : false
7. Allow use of priority : true
8. Hide SM attributions : false
9. Allow use of receipts : true
10. Allow editing of identity : true/true
11. Allow server thread sort : false
12. Allow server-side sorting : false
13. Allow server charset search : true
14. Enable UID support : true
15. PHP session name : SQMSESSID5.SquirrelMail の設定が終わったら Apacheの設定をしましょう。
# cd /etc/httpd/conf
# vi srm.conf
<Directory /webmail>
Options +ExecCGI
AllowOverride All
</Directory>6.Apacheを再起動して、Webにアクセスしてみましょう。
http://www.sea-bird.org/webmail/
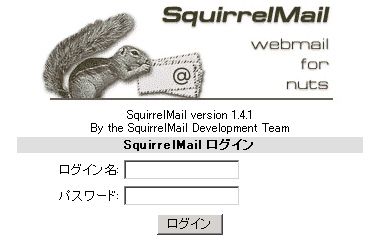
7.下記のログイン画面が表示されれば、okですー。
![]()